
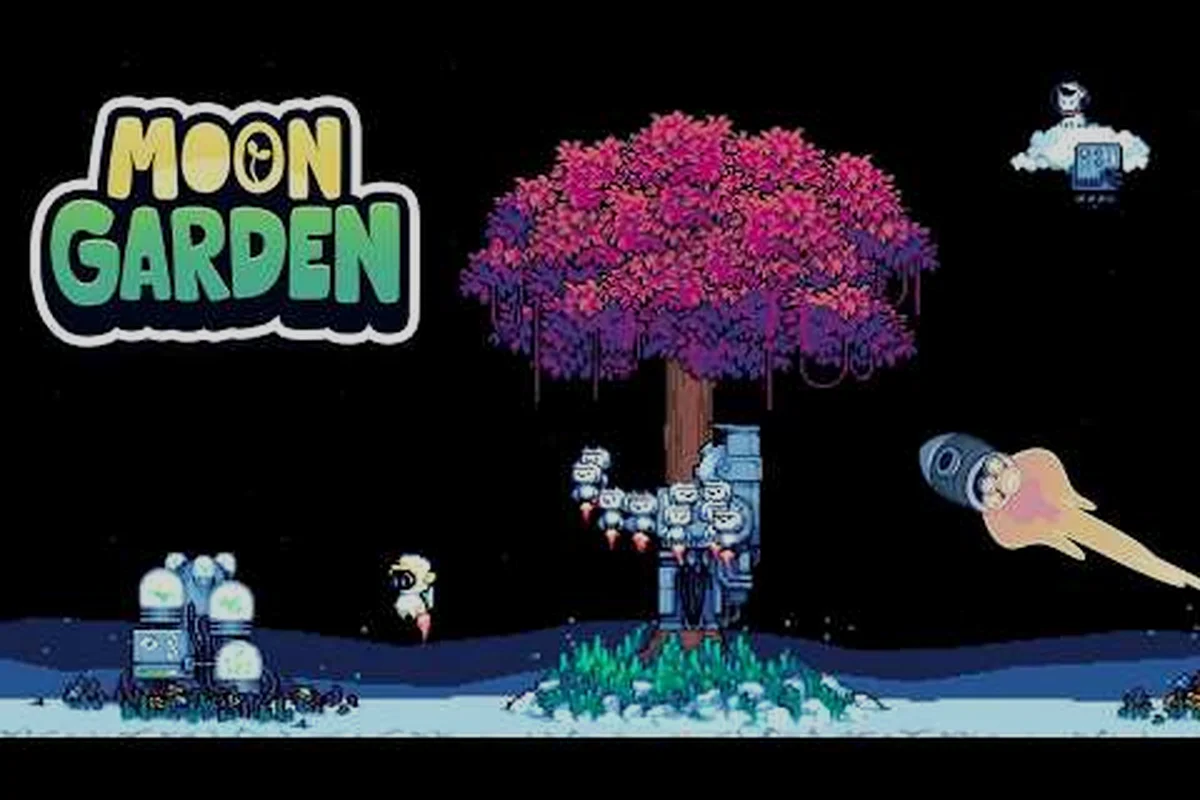
Moon Garden is a cozy incremental about growing a tree tall enough to escape a small moon, and this Moon Garden full guide is built for players who want every layer of the loop explained. The game drops you straight into Garden Pods, a pachinko vending machine, and a stardust shop without much hand-holding, so knowing the underlying rhythm turns a confusing first hour into a smooth climb. Below, each section walks through one major system, then closes with a practical Moon Garden best starting strategy you can apply on your first run.
Moon Garden Core Loop and How Every System Connects
The Moon Garden core loop is a chain of five interlocking phases that repeat across a run and accelerate through resets. According to the Moon Garden on Steam store page, the official description frames the loop as planting flowers, spending Stardust on permanent upgrades, buying seeds from a pachinko vending machine, mulching the tree so it grows back stronger, and building little robots to help automate the garden. Community posts in the Steam community hub describe the same flow but in player terms, treating the pachinko machine, mulch resets, and robots as the three late-game multipliers that decide how fast a tree escapes the moon.
| Phase | Player Action | Resource Produced | What Feeds Next Phase |
|---|---|---|---|
| Plant | Place flowers in Garden Pods | Pollen | Seeds, vending machine balls |
| Vending | Drop balls in the pachinko machine | New seeds | Rarer flowers, higher pollen |
| Upgrade | Spend Stardust in the permanent shop | Multipliers | All phases scale up |
| Automate | Build robots and satellites | Passive pollen | Frees the player to plan resets |
| Mulch | Reset the tree for a permanent boost | New growth bonuses | Faster tree height on next run |
The first three phases are where the Moon Garden best starting strategy lives, because early decisions compound once mulching kicks in. Players who skip robots and rush straight for a mulch reset usually hit a soft wall around the second or third run, while players who invest in even one cheap robot find that later seeds become affordable without babysitting the pods.
Garden Pods, Flowers, and the Foundation of Pollen Output
Garden Pods are the planting slots that drive every other resource in the game, so the Moon Garden complete guide starts here for good reason. Each pod accepts one flower at a time, and each flower has a growth cycle that produces pollen on completion. The trick is that pods are limited early on, and the flowers you place first will outlive several seed swaps, so the Moon Garden best starting strategy is to keep one strong seed type in rotation rather than churning through every new drop.
A practical comparison helps when choosing which flowers deserve the first few pods, because the in-game helper text only shows the base values, not how they scale with Stardust multipliers. The table below paraphrases community-reported values from player testing on the launch build.
| Flower Tier | Base Pollen | Growth Time | Best Use |
|---|---|---|---|
| Starter bloom | Low | Short | Fills early seed needs |
| Mid-tier hybrid | Medium | Medium | Carries you to first Stardust spike |
| Rare lunar | High | Long | Anchor flower after mulching |
| End-game blossom | Very high | Long | Requires satellite automation |
Rare and end-game flowers are the long-term anchors, but they are slow and expensive, so the Moon Garden tips reddit threads consistently recommend pushing mid-tier hybrids into every available pod before risking a rare seed. Players also report that leaving one pod empty for experiments is wasteful on the first run, because even a cheap starter bloom outperforms an idle slot once pollen compounds.
Stardust feeds directly back into the pods through multipliers, and that is where the Moon Garden complete guide pivots from planting to the permanent upgrade layer. A pod holding a mid-tier flower with a 2x pollen multiplier produces twice the pollen of an identical pod without the upgrade, which means a small early investment in pod-related upgrades pays for itself before the first mulch reset. The full upgrade list and priority order lives in the Moon Garden stardust multiplier breakdown, but the headline rule is to apply multipliers to the pod that already produces the most pollen, not the one that looks rarest.
The Pachinko Vending Machine and Seed Economy
The pachinko vending machine is where seeds come from, and it is the most misunderstood part of the Moon Garden steam guide conversations because its outcome looks random at first glance. According to community data, the machine accepts pollen as its currency and drops balls through a pegboard that funnels into seed slots, with rarer seeds sitting behind tighter gaps. Players who dump a single large payment usually get one or two rare hits, while players who drop small batches often walk away with more seeds overall.
| Drop Strategy | Average Yield | Risk Profile | Best Timing |
|---|---|---|---|
| One large drop | 1-2 rare seeds, fewer total | High variance | After a Stardust spike |
| Multiple small drops | More common seeds, steady supply | Low variance | During early-run grind |
| Mixed batching | Balanced across tiers | Medium variance | Right before a mulch reset |
The Moon Garden best starting strategy here is to use small drops until the first Stardust spike, then switch to a single large drop for the rare seeds that justify a pod rotation. Seed management gets more nuanced once the pachinko starts offering hybrid and lunar seeds, and the dedicated Moon Garden seed guide covers how to read each seed card and which flowers pair well with which pachinko drops. Players also tend to underestimate how much the machine's pollen cost scales, so spending a small batch too late can leave the machine underfunded at exactly the wrong moment.
There is also a hidden efficiency layer in the vending machine that comes from robot automation, which the next section covers in detail. Robots that deliver pollen straight into the machine remove the babysitting cost of repeated small drops, and that is why the Moon Garden tips reddit discussions often rank vending automation as the single biggest mid-run unlock after the first mulching.
Stardust Multipliers, Upgrades, and the Permanent Layer
Stardust is the resource that survives mulching, and the Moon Garden complete guide treats it as the long-term currency that turns a good first run into a strong second run. The permanent shop offers multipliers that affect pollen output, seed cost, machine efficiency, robot speed, and tree growth, and the order in which you buy them shapes how fast the second and third runs snowball. Community testing suggests that pod-related multipliers outperform everything else in the first hour, while robot and machine multipliers catch up after the first mulching.
| Upgrade Category | Early-Run Value | Late-Run Value | Recommended Phase |
|---|---|---|---|
| Pod pollen | High | Medium | First run, before mulching |
| Seed cost | Medium | High | Right after first mulching |
| Machine efficiency | Low | High | Once robots are online |
| Robot speed | Low | Very high | Late first run onward |
| Tree growth | Medium | High | Right before final escape push |
A common Moon Garden best starting strategy is to spend the first Stardust entirely on pod multipliers, then hold the next batch for seed cost relief once the pachinko starts feeling expensive. The Moon Garden steam guide also reminds players that upgrades stack multiplicatively, so two 2x multipliers in the same category beat one 4x upgrade if the 4x is overpriced. Players who reach a soft lock usually discover it because they spread Stardust too thin across every category instead of pushing two or three multipliers to their second tier.
The permanent layer also includes a few one-time unlocks that do not show up in the standard shop, and these are the kinds of unlocks that the Moon Garden tips reddit threads tend to surface after launch. Examples include expanded pod slots, new machine pegs, and a satellite that orbits the tree to collect bonus pollen. None of these one-time unlocks are required to escape the moon, but each one removes a small bottleneck that compounds across runs.
Robots, Satellites, and Automation as a Force Multiplier
Robots and satellites are the automation layer of the Moon Garden full guide, and they are what separate a casual first run from the optimized climbs that show up on player leaderboards. Robots take pollen from pods and deliver it to either storage, the vending machine, or the upgrade shop, while satellites orbit the central tree to passively generate bonus pollen over time. According to the Moon Garden on Steam description, building little robots is positioned as one of the three long-term goals alongside mulching and Stardust spending, which matches how community play sessions describe automation as the second-half unlock.
| Automation Tool | Function | Cost Tier | When to Build |
|---|---|---|---|
| Pollen hauler robot | Moves pollen from pods to storage | Low | After first Stardust spike |
| Vending robot | Feeds the pachinko machine | Medium | Once machines run dry often |
| Upgrade robot | Auto-buys low-cost upgrades | Medium | During long idle segments |
| Satellite | Passive bonus pollen over time | High | Late first run or second run |
The Moon Garden best starting strategy for automation is to build the pollen hauler first, because it removes the most repetitive clicking and frees the player to manage seeds and upgrades. The vending robot is the next priority once the pachinko machine becomes the main pollen sink, and the upgrade robot is best saved for when the player has a clear picture of which low-cost upgrades to spam. Satellites are expensive enough that most players delay them until the second run, when Stardust multipliers make the satellite cost feel manageable.
Automation also changes how mulching feels, because a fully automated garden produces enough idle pollen to keep the machine fed even while the player is offline. The Moon Garden on Steam store page explicitly lists building little robots as part of the core loop, which the Moon Garden steam guide interprets as a strong hint that automation is a designed progression goal, not an optional efficiency layer. Players who skip robots entirely report longer runs and slower mulching cycles, even when their Stardust spending is identical to automated runs.
Mulching, Reset Cycles, and the Long-Term Climb to the Moon
Mulching is the reset mechanic in Moon Garden, and it is the final piece of the Moon Garden full guide because every other system feeds into how fast a player can mulching cycle. According to community data and the official store page, mulching the tree resets the current run but grants permanent growth bonuses, so each cycle starts faster and reaches deeper into the seed and automation layers than the previous one. The Moon Garden best starting strategy for mulching is to wait until the pod layer is fully upgraded and at least one robot is online, because mulching too early sacrifices a long tail of pollen output for a small permanent boost.
| Mulch Stage | Tree Height Goal | Permanent Reward | Recommended Setup |
|---|---|---|---|
| First mulch | Reach roughly 50% height | Pod multiplier | Pollen hauler robot, mid-tier flowers |
| Second mulch | Reach roughly 75% height | Seed cost reduction | Vending robot, rare flowers |
| Third mulch | Near escape height | Machine efficiency | Full automation suite |
| Final escape | Touch the sky | Game completion | All multipliers, satellite online |
The second mulch is where most players feel the loop click, because the seed cost reduction combines with the first mulch's pod multiplier to make rare flowers affordable for the first time. By the third mulch, the Moon Garden complete guide recommends treating the run as an automation showcase rather than an active grind, because every minute spent babysitting pods is a minute not spent optimizing the next mulch timing. Community posts in the Moon Garden tips reddit threads echo this rhythm and note that players who rush past the second mulch tend to stall on the third because their automation is not yet strong enough to feed the pachinko at scale.
Mulching also unlocks new flower seeds and pachinko peg layouts, which the Moon Garden flower guide covers in detail. These late-game flowers are the anchors for the final escape push, and they are what make the third mulching feel fundamentally different from the first two. The Moon Garden steam guide framing is that the moon escape is not a single-run achievement but a multi-cycle climb where each mulch acts as a permanent difficulty dial, and the Moon Garden full guide ends here because the next step is simply to keep cycling until the tree reaches the sky.
Frequently Asked Questions
How long does a first run of Moon Garden usually take?
A first run typically lasts between 45 minutes and 90 minutes depending on how quickly the player picks up the pachinko and Stardust rhythm, because the early game is short but the first mulching extends the run by an extra 20 to 30 minutes. Players who build the pollen hauler robot early tend to finish faster because they spend less time clicking pods.
What is the best starting strategy for Moon Garden new players?
The best starting strategy is to push one strong seed type into every available pod, spend the first Stardust entirely on pod multipliers, and build a pollen hauler robot before attempting the first mulching. This Moon Garden best starting strategy is the same approach the launch community converged on in the first week of player testing.
Is Moon Garden playable on controller or only mouse?
The game is mouse-driven at launch with no native controller support, which matches its incremental design where most actions are clicks rather than movement. Players who prefer controller input usually remap a mouse to a stick, but the official experience is built around the mouse.
How do Stardust upgrades interact with each other?
Stardust upgrades stack multiplicatively within the same category and additively across categories, so two 2x pod upgrades give a 4x total while a 2x pod upgrade and a 2x seed cost reduction give separate 2x boosts. The full priority list and softlock avoidance is covered in the Moon Garden stardust multiplier breakdown, which complements this Moon Garden complete guide.
What is the best way to use the pachinko vending machine?
Drop small batches of pollen early to build a steady seed supply, then switch to a single large drop right after a Stardust spike for rare seeds. Players who want a deeper look at the seed economy can read the Moon Garden vending machine guide, which extends the Moon Garden steam guide approach with a full seed-by-seed breakdown.